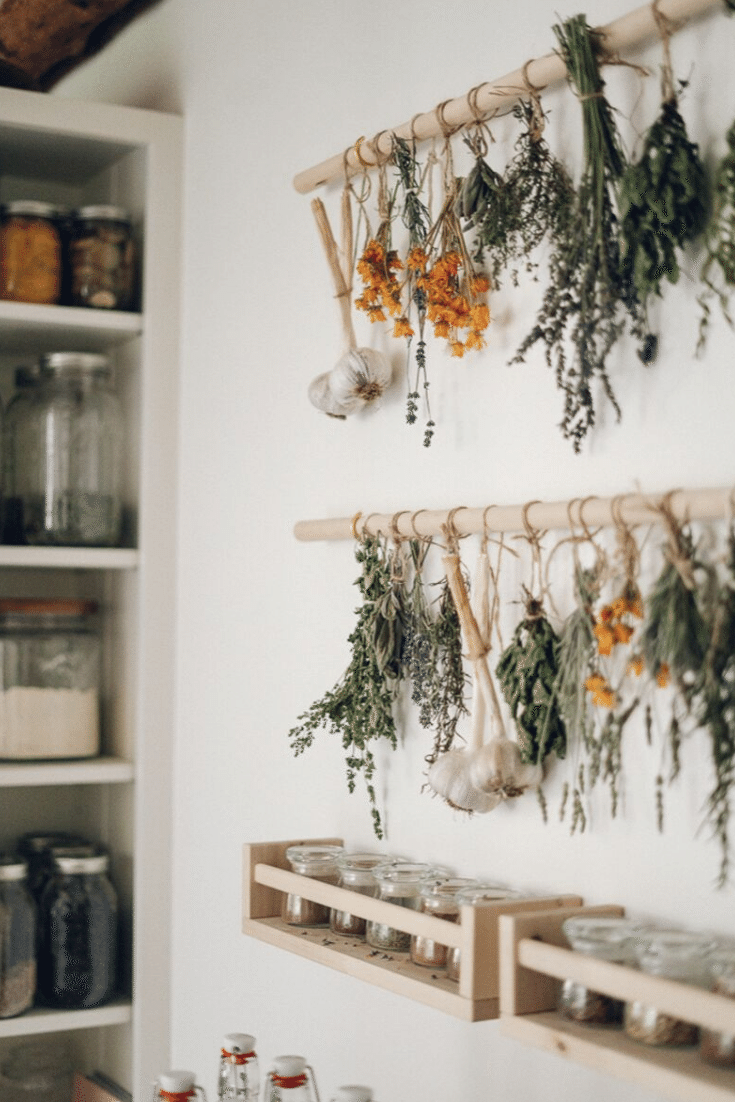
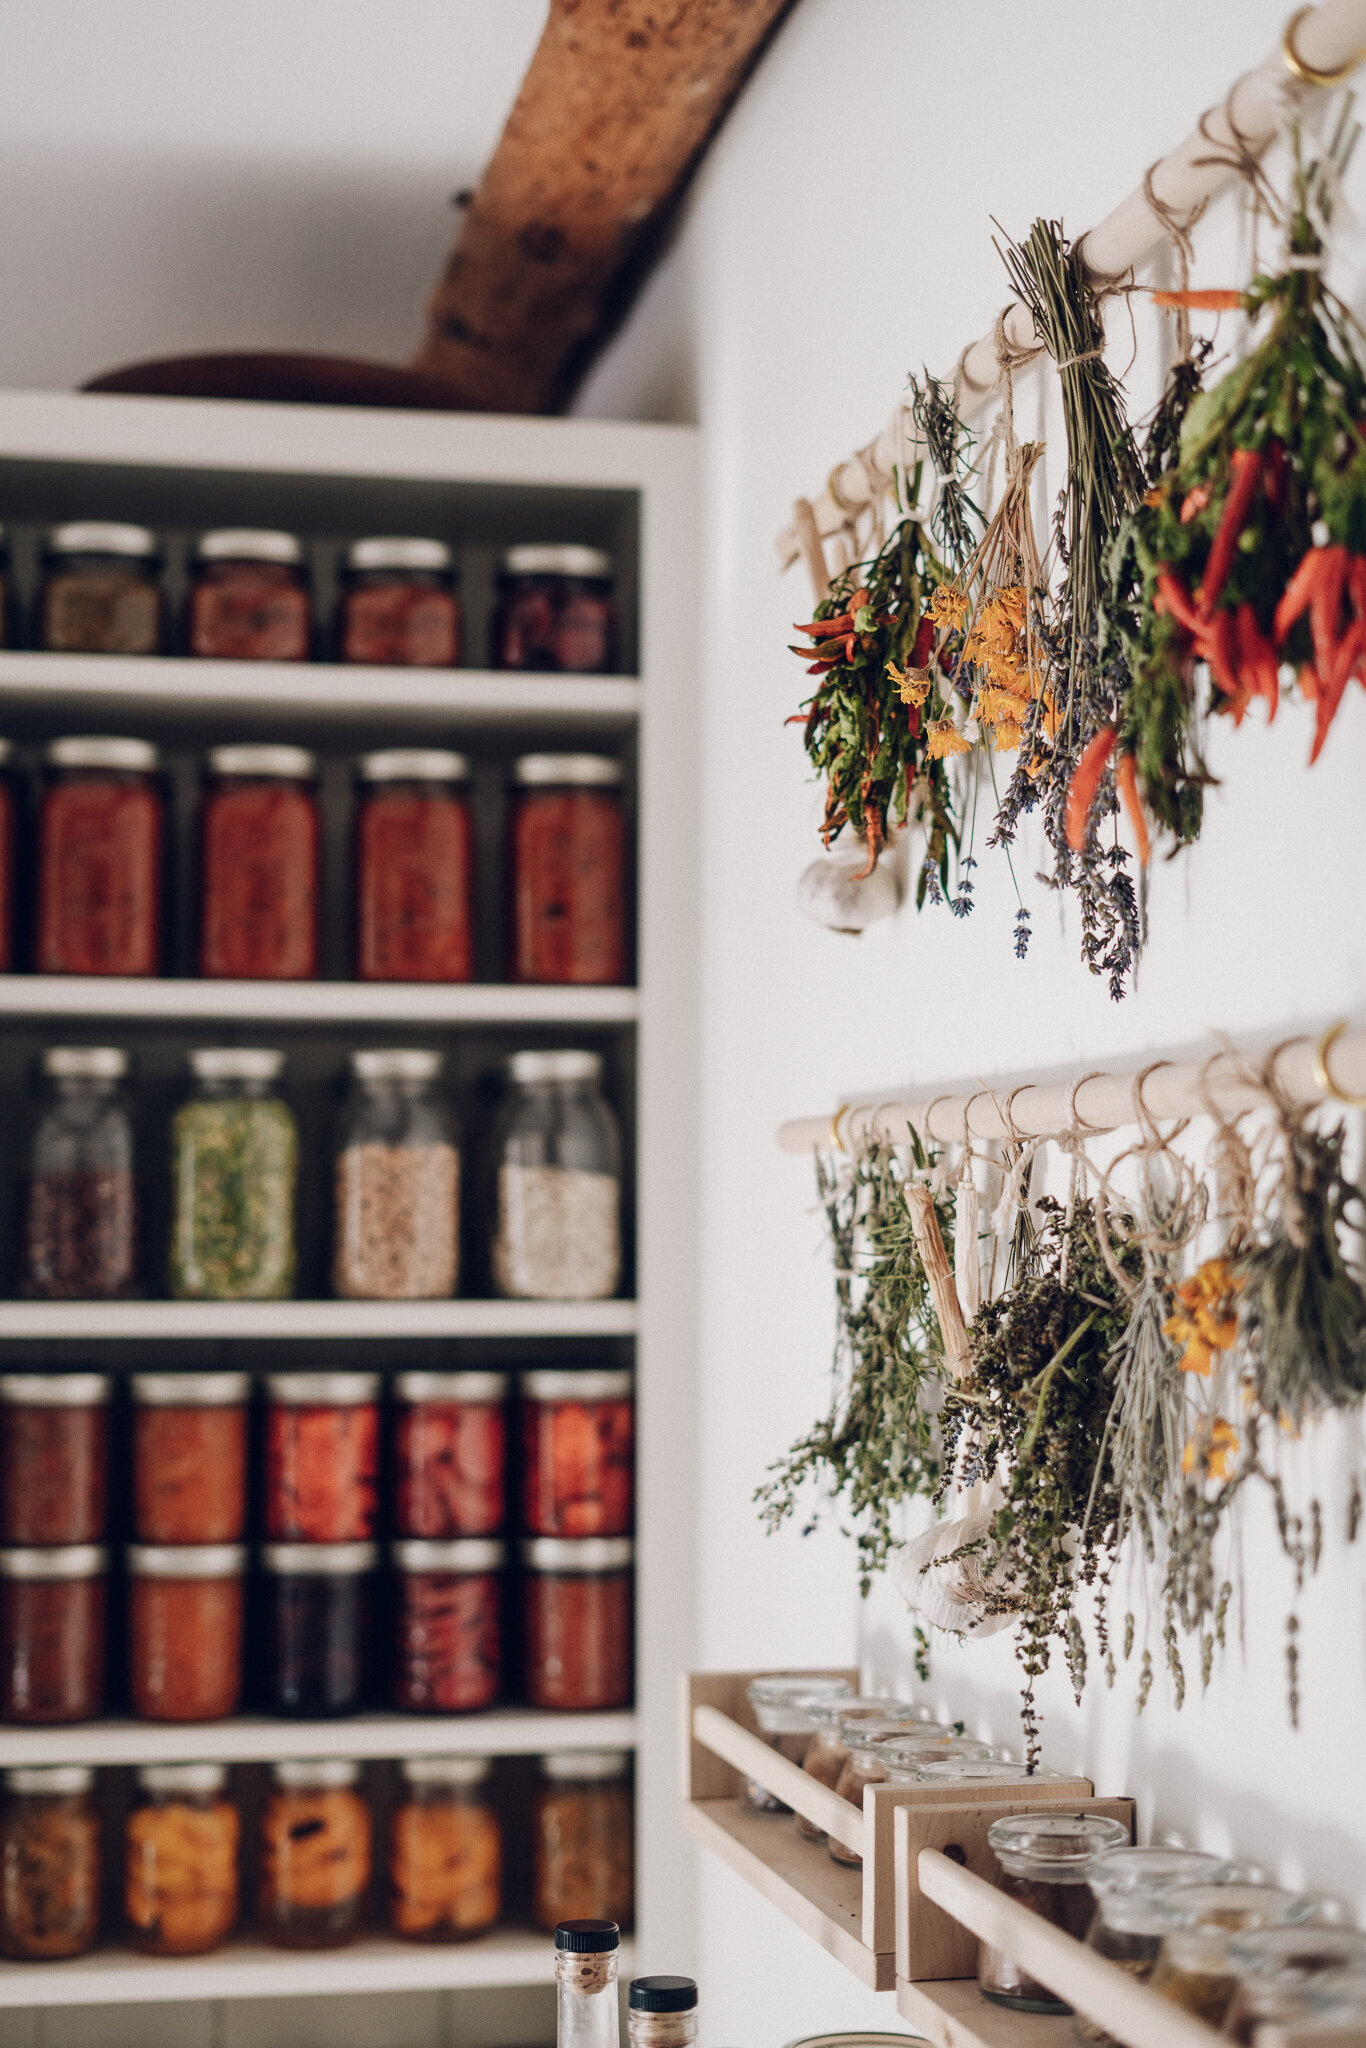
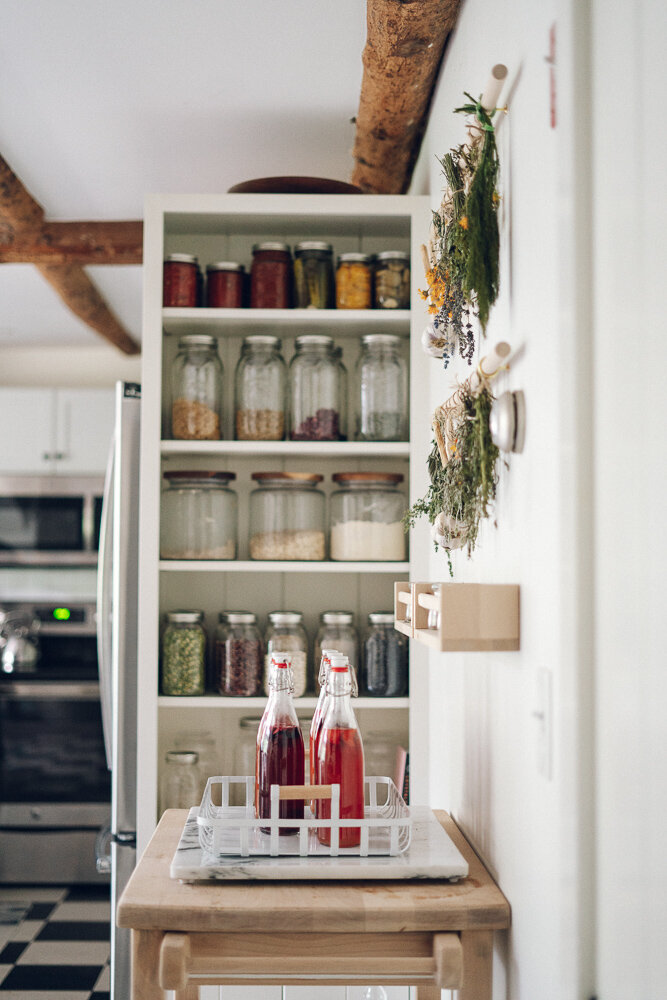
This beautiful DIY herb drying rack is an easy solution for drying and storing all your fresh summer herbs for year-long use. This homemade drying rack for herbs only requires a few materials and can come together in less than 30 minutes.
DIY Herb Drying Rack
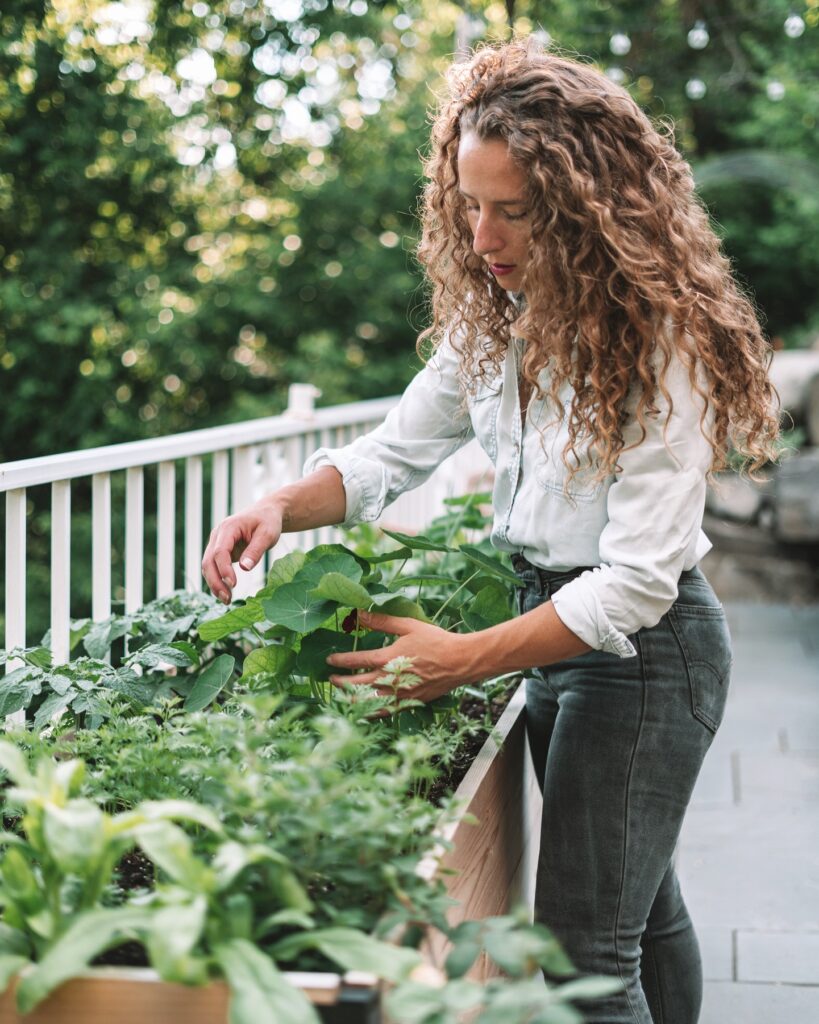
This year as my herb garden expanded I realized that I needed a much better way to hang and dry the many varieties of herbs that were growing in my summer garden. So I decided to create this simple and beautiful DIY herb drying rack.
I can’t tell you how many antique stores and vintage craigslist listings I searched in hopes of finding a vintage herb drying rack of my dreams, but unfortunately, I was never able to track on down. I guess I will just have to add it to the list of vintage dream pieces that one day when I am not looking will probably find me.
So when I can’t find exactly what I need in my favorite vintage shops I love to get inspired by the feeling a vintage piece possesses, and use my own creative freedom to create a DIY version.
For this vintage-inspired wooden herb drying rack I knew I wanted something that could:
- Hang on the wall and not take up a lot of space
- Hold a lot of herbs
- Double as a decorative piece
- Be reminiscent of something found in an old farmhouse
Inspiration For My DIY Herb Drying Rack
Growing a wide variety of herbs is my favorite part of our garden, mostly because I love thinking about how I will be able to use all the fresh herbs I grow in the summer months for warming teas and healing herbal medicines as the year progresses.
But when you grow a lot herbs you need to have a good way to dry and store them, and after quite a few makeshift options I finally came up with the perfect solution for drying a lot of herbs at one time that just so happens to double as a pretty wall display in my kitchen.
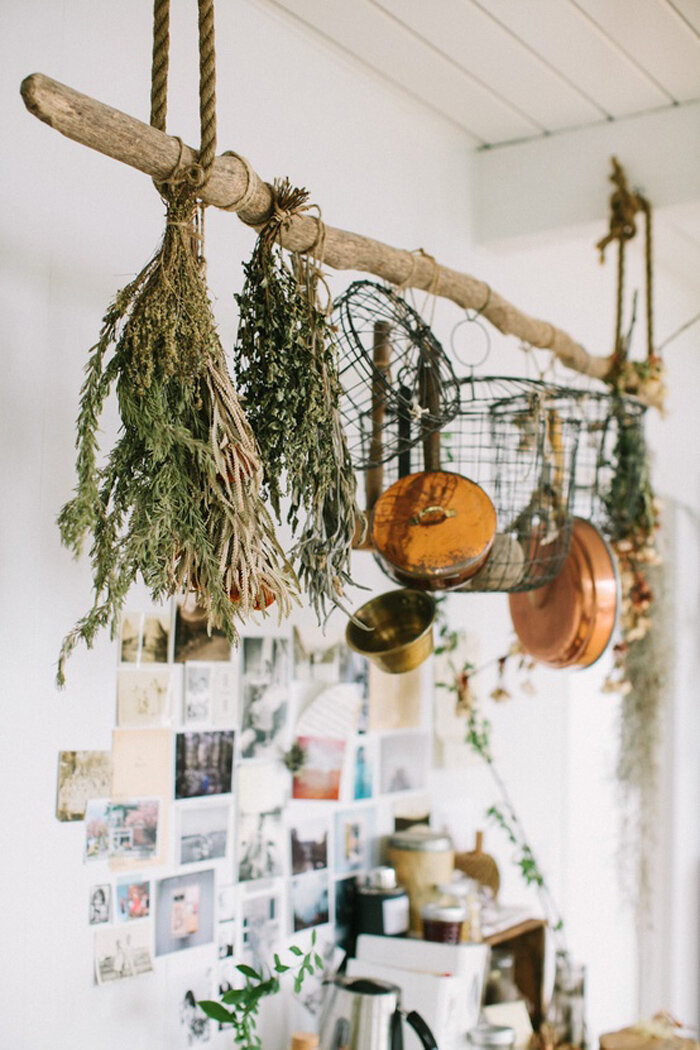
Source: Pinterest

Source: Temperance Rose
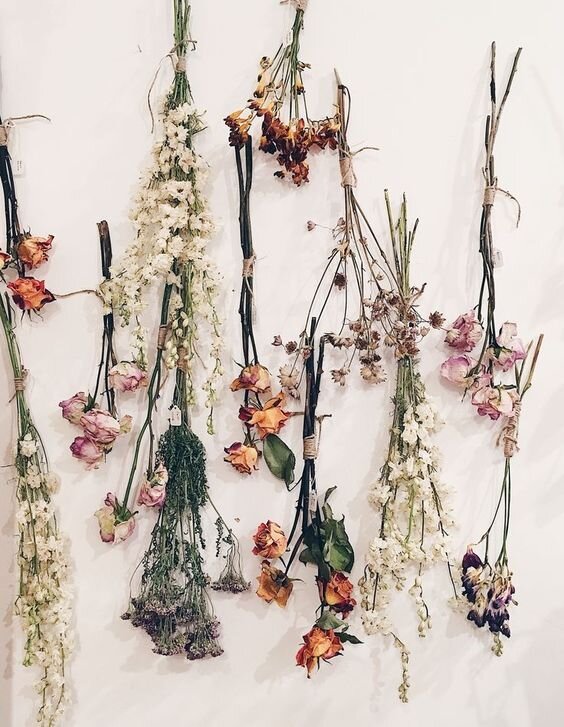
Source: Pinterest
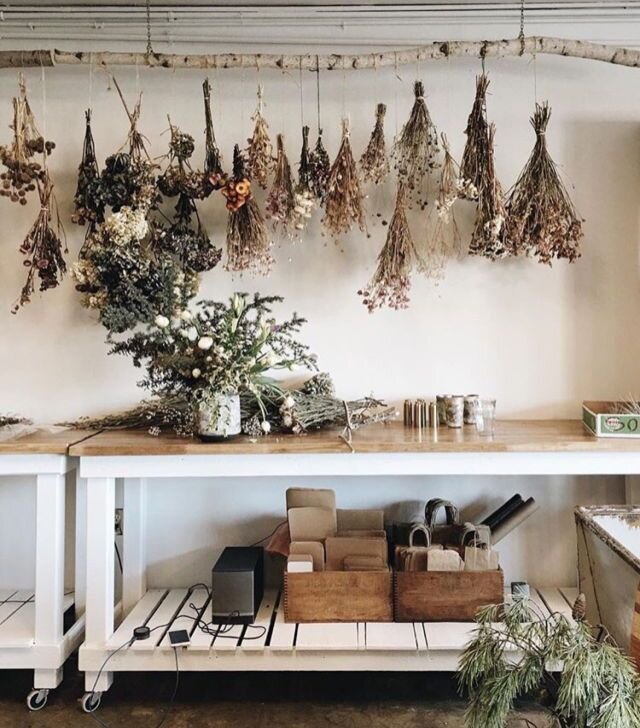
Source: Creative Market
How To Dry Herbs At Home With A DIY Herb Drying Rack
Drying herbs at home is really easy, especially if you have a drying rack that you can quickly hang your bunches of herbs from the garden on as you harvest them.
When drying herbs at home there are a few different options to consider before deciding what the best choice will be for your home and your specific needs. Depending on your space, quantity, and humidity levels some herb drying options may be better than others.
Hang Drying Herbs
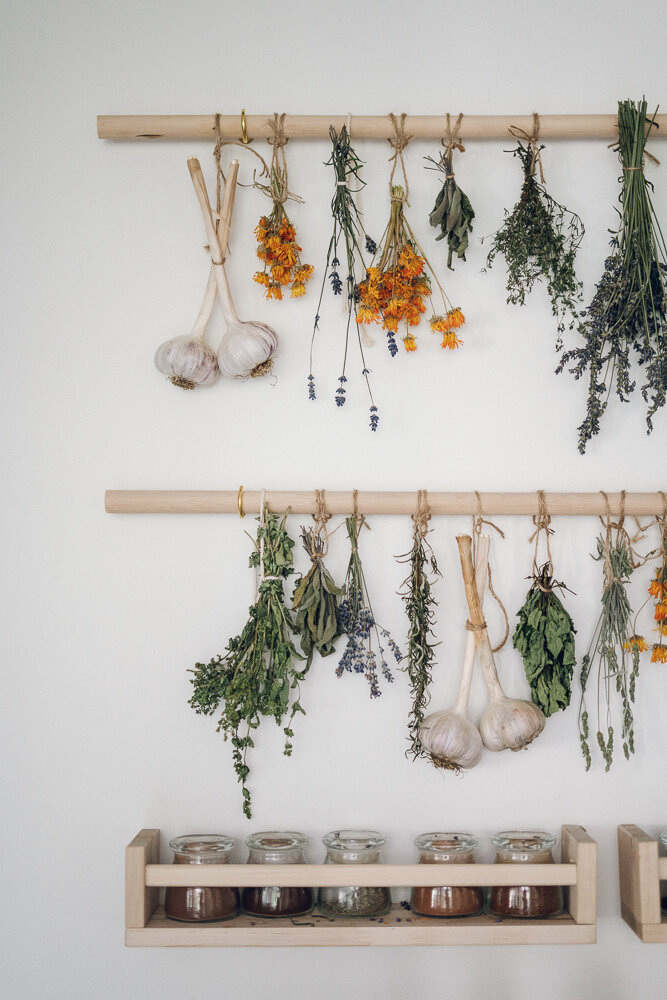
This is how I prefer to dry herbs because just looking at hanging dried herbs makes me feel like I am living in an old country farmhouse with a simpler, slower way of life. This option is great if you don’t have a lot of space to work with and also want your herbs to double as a pretty hanging display.
If you live in a very humid climate this may not be the best option for you though as it can be difficult to get the herbs fully dried. One additional step that can help combat humidity in the air would be to place a brown paper bag over your hanging dried herbs. The paper bag will help soak up some of the moisture in the air and keep your herbs a little drier.
Drying Herbs With Herb Drying Racks
If you have A LOT of herbs to dried and preserve then you may want to opt for flat laying your herbs in flat drying racks or screens. This way you can stack them and dry more herbs at one time. The only issue with this option is that drying racks can take up a lot of space so you really will need a designated area to store your herb drying racks if you go this route.
Drying Herbs In A Dehydrator
If you really love growing and drying herbs then investing in a dehydrator may be something to consider. While most dehydrators cant dry a lot of herbs at one time, using a dehydrator can help dry your herbs fast (usually within 24 hours) and can help ensure that they were dried at low enough temperature and that no moisture remains in your herbs.
How To Dry Herbs In The Oven
Oven drying herbs is an easy option for those who want to quickly dry their herbs, but I have to say that it would be my last resort. The high heat of ovens (most won’t go lower than 170 degrees F) can impact the flavor, color, and beneficial oils found in the herbs.
If you do choose to oven-dry herbs though just make sure that you use the lowest possible setting and keep the oven door ajar slightly. Most herbs will take an hour or so to dry completely, which depends entirely on the moisture content of the herbs.
Tips For Hang Drying Herbs In Humid Climates
If you live in a dry climate that you most likely will not have any issues hang drying herbs. However, if you are like me and live in a part of the world where it can be very humid, you may need to do a few extra things to ensure that your herbs are fully dry and don’t spoil or grow mold.
Tip #1: Don’t Overfill Your Herb Bundles
It can be tempting to hang giant bundles of herbs together, but you want to make sure that all the herbs in your bundles can get good air circulation and dry quickly. If your herb bundles are too big is can be difficult for the center herbs to dry fully.
Tip #2: Place A Paper Bag Over Your Herb Bundles
Placing a small paper bag over each bundle of herbs may not be the prettiest option, but it will help to absorb some of the moisture in the air, protecting your herbs from the humidity and allowing their to air dry faster.
Tip #3: Choose The Driest Location In Your House
When choosing where to place your DIY hanging herb drying rack make sure to seek out the driest place in your home or kitchen. You will also want your herbs to be out of direct sunlight to help preserve and protect their beneficial chemical properties.
Tip #4: Run A Dehumidifier
If you are living in an area with a lot of humidity you may want to run a dehumidifier anyway to help improve air quality, and your hanging herbs will thank you. In the summer months we always have a dehumidifier running in my home to help reduce the excessive moisture in the air, which really helps my herbs dry faster.
Tip #5: Use A Dehydrator
If you feel like you are always fighting the humidity and your herbs are never able to fully dry then it may be time to invest in a dehydrator. While they can be an expensive investment, in the long run, you will save so much money by drying your own herbs, as well as other fruits and vegetables that you wouldn’t have been able to otherwise.
What You Will Need For Your DIY Herb Drying Rack
The best part about this wooden herb drying rack is that it is super simple to make and requires very few materials, making it a very affordable DIY herb drying rack option for your homegrown herbs that doubles as a beautiful wall display.
- Measuring Tape
- Level
- Needle Nose Pliers
- 2 Wooden Dowels
- 4 Gold Hooks
- 1 Ball Of Twine Or Cotton String
- Glass Jars
- Optional: Ikea Wooden Spice Rack
- Optional: Glass Spice Jars

Step-By-Step DIY Herb Drying Rack Instructions
In just a few short steps you will have a stunning vintage-inspired herb drying rack ready to be filled with your favorite herbs for drying. Simply follow the instructions below and make sure to always measure before screwing any holes into the walls.
Step One
- Choose the space where you will hang your herb drying rack and measure where you would like it to go on your wall.
- To hang your herb drying rack in the center of your wall simply measure the length of the wall and mark the mid-point. Then measure your dowel and mark the mid-point of your dowel. Align both mid-points and your dowels will be centered on the wall.
- You will also want to measure out enough space between each wooden dowel to allow enough room for your herb bundles to hang. I measured 14 inches between each dowel which works perfectly for most of the herbs I dry.
Step Two
- Once you know where you would like your dowel to be hung on your wall it’s time to mark where your gold hooks will be screwed into the wall.
- For this herb drying rack, I measured three inches in from each end of the dowels and made a mark on the wall for where the gold hooks would be screwed into the wall.
Step Three
- Before screwing the gold hooks into the wall make sure that your dowel can slid into the hooks.
- I needed to open the hooks just slightly using a needle-nose pliers to make enough room for the dowel to fit in them and this is much easier to do before you have the hooks screwed onto the wall.
Step Four
- Screw your gold hooks into the wall where you made your marks.
- Because this wooden herb drying rack isn’t very heavy you don’t need to worry about finding studs to support it.
Step Five
- Slide your dowels into the gold hooks and begin hanging your herb bundles by taking some string or twine and tying them to the wooden dowels.
Step Six
- Once your herbs have dried you can remove the dried herb foliage from the stems and store your freshly dried herbs in airtight containers for later use.
And that’s it! A vintage-inspired DIY herb drying rack that couldn’t be simpler to make and is sure to become one of your favorite features for showing off your garden herbs and making drying them a whole lot easier!


